-

-
Location:
1922 Mentor Ave, Painesville Twp.
Location:
1922 Mentor Ave, Painesville Twp.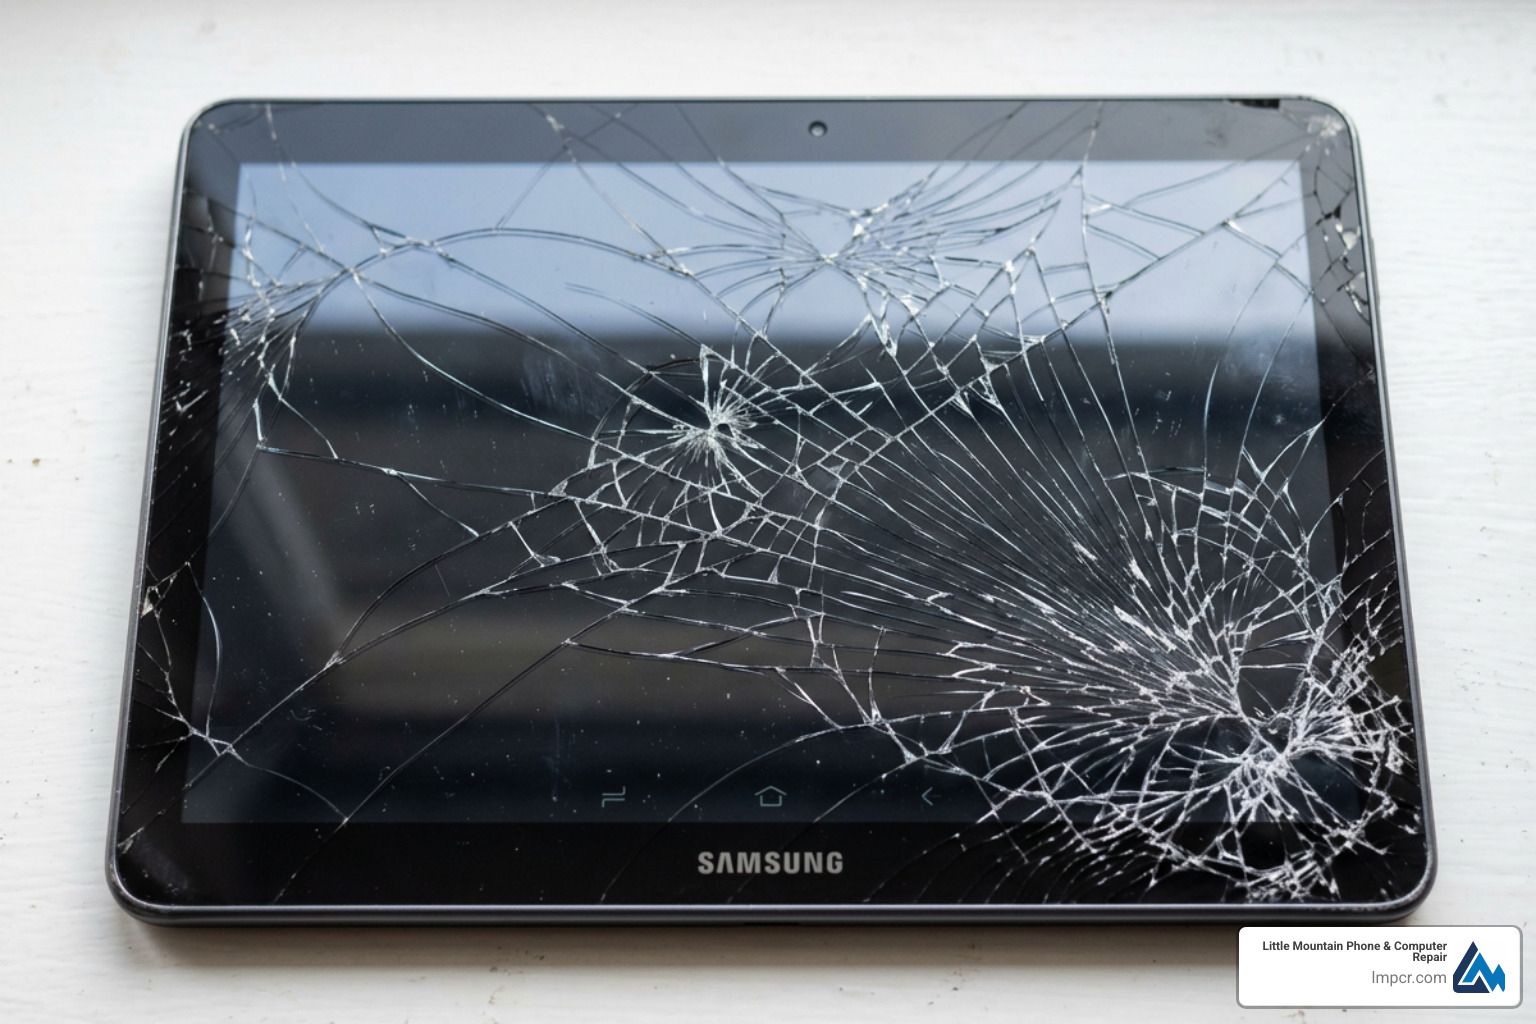
Samsung Tab A screen damage is one of the most common tablet repair issues we see — and the good news is it’s fixable, whether you go DIY or take it to a pro.
Quick answer: How to replace a Samsung Tab A screen
A cracked display, unresponsive touch, or flickering screen can make your tablet nearly unusable. The Tab A series spans many models — from the Tab A 7.0 to the Tab A8 10.5 — and each one has slightly different hardware. That means using the wrong part or the wrong technique can turn a simple fix into a bigger problem.
I’m Jay Baruffa, President of Little Mountain Phone & Computer Repair, and my team handles Samsung Tab A screen replacements regularly alongside a full range of smartphone, tablet, and computer repairs. In this guide, I’ll walk you through everything you need to know to get your tablet working again.

Simple guide to Samsung Tab A screen:
Before you even think about picking up a screwdriver, you need to know exactly which tablet is sitting on your workbench. The Samsung Galaxy Tab A family is huge. If you buy a screen for a Tab A 10.1 (2016) but you actually own a Tab A 10.1 (2019), the connectors won’t match, and you’ll be stuck with a paperweight.
At Little Mountain Phone & Computer Repair, we see many DIY attempts stall because of incorrect parts. For example, the Galaxy Tab A8 10.5 (SM-X200/X205) uses a completely different internal layout than the older Tab A 10.1 models.

To find your specific model number, look for the “SM-” prefix followed by four characters (like SM-T510 or SM-X200). You can find this in three places:
When searching for a Samsung Tab A screen, you’ll find options ranging from $15 to over $100. While places like Amazon.com and Walmart offer various third-party kits, we always recommend looking for “OEM Quality” or genuine Samsung parts.
For instance, a genuine Samsung Galaxy Tab A8 10.5″ LCD Screen (part GH81-21915A) typically costs around $99.99. In contrast, older models like the Tab A 10.1 2019 might have replacements available for $40 to $52. Be wary of “glass only” repairs; these require specialized machinery to fuse the glass to the LCD. For a DIY repair, always buy the full LCD and digitizer assembly.
| Feature | Tab A8 10.5 (2021) | Tab A 10.1 (2019) |
|---|---|---|
| Model Number | SM-X200 / SM-X205 | SM-T510 / SM-T515 |
| Resolution | 1920 x 1200 (WUXGA) | 1920 x 1200 (WUXGA) |
| Screen Type | TFT LCD | TFT LCD |
| Repair Difficulty | Moderate | Moderate |
You wouldn’t try to flip a pancake with a screwdriver, so don’t try to fix a tablet with kitchen utensils! Having the right tools is the difference between a clean repair and a cracked frame.
For a standard Tablets iPad Repair or Samsung Tab repair, you will need:
Before you start, clear a flat, well-lit workspace. We recommend using an anti-static mat to protect the Samsung Galaxy internals from static discharge.
Pro Tip: Safety glasses are a must. When you pry a cracked screen, tiny shards of glass can fly off. Also, keep a fire-safe container nearby. If you accidentally puncture the lithium-ion battery during the repair, it can vent or catch fire. Always discharge your battery below 25% before starting to reduce this risk.
Every model is slightly different, but the general workflow for a Samsung Tab A screen replacement follows a similar path. We’ve synthesized these steps based on industry standards and iFixit-style methodologies.
Even for experienced techs, things don’t always go perfectly. If your tablet behaves strangely after the repair, don’t panic.
A common complaint after a Samsung Tab A screen replacement is that the “soft keys” (Back and Recent Apps buttons) stop working. This usually happens for two reasons:
If you experience “ghost touching” (where the tablet acts like it’s being touched when it isn’t), it’s often due to a poor quality digitizer or static trapped under the glass. Try restarting the device or cleaning the screen thoroughly.
We strongly recommend replacing the full LCD assembly. While you can find “glass only” kits for under $20, the process of separating the glass from the LCD requires a vacuum heat plate and specialized wire. For DIYers, trying to replace just the glass usually ends with a broken LCD anyway. Buying the full assembly ensures a higher quality display and a much easier installation.
The cost depends on whether you do it yourself or hire a pro.
For a beginner, expect the process to take 1.5 to 3 hours. You’ll want to move slowly, especially during the adhesive removal phase. An experienced technician at a Tablet repair shop can often finish the job in 30 to 45 minutes because they have professional-grade heating plates and precision tools. Don’t rush the adhesive curing; once the screen is on, we recommend weighted pressure for at least an hour to ensure it stays sealed.
Replacing a Samsung Tab A screen is a rewarding way to save money and keep your favorite device out of a landfill. However, it requires patience, the right tools, and a steady hand. If the process seems a bit too daunting, or if you’ve started the repair and hit a snag, we are here to help.
At Little Mountain Phone & Computer Repair, we have over 20 years of experience fixing everything from the latest iPads to the most obscure Samsung tablets. We serve neighbors across Lake County, including Painesville, Mentor, Chardon, and Willoughby. With an average repair time of just 30 minutes, we can get your tablet back in your hands before you finish your lunch.
Ready to get that screen fixed? Check out our Professional Tablet Repair Services and let us take the stress out of your tech troubles!

Need Help?
© Big Hill Technologies, LLC. All Rights Reserved